How to Build an Indoor Drip Irrigation System to Water Starter Seeds

Starting your home garden from scratch is a rewarding journey. For the avid gardener, watching your vegetable seeds sprout and thrive within the comfort of your own home can make the long winter months turn to thoughts of spring planting. If you want to enhance your indoor plant care methods, drip irrigation can be revolutionary. This technique delivers water directly to the soil at the base of your plants, ensuring they receive just the right amount of hydration without the mess or fuss of overwatering. With Rain Bird's range of efficient and user-friendly products, it's easy to set up a simple indoor drip irrigation system for your seedlings.
Benefits of Starting Vegetables from Seed Indoors
Cost-Effective Gardening
Starting your vegetable garden from seeds is an economical choice. Seeds are cheaper than buying seedlings or mature plants. Plus, when you grow from seeds, you can save and reuse new seeds year after year. This method keeps your gardening budget in check, allowing you to invest in other gardening tools and supplies.
Variety and Control
One advantage of starting vegetables from seed is the vast variety available. Many unique and heirloom varieties that you won't find in local nurseries are accessible through seed catalogs and online stores. Growing from seeds allows you to experiment with different vegetables and broaden your palate.
Optimal Growing Conditions
Starting seeds indoors gives you complete control over your plant's environment. You can regulate the temperature, light, and humidity, ensuring optimal conditions for germination and growth. This control leads to healthier, stronger plants that are better equipped to handle outdoor conditions once transplanted.
Early Start on the Growing Season
Growing your vegetables from seeds indoors means you can get a head start on the growing season. By the time the last frost passes, your seedlings will be mature enough to transplant outdoors. This head start can extend your growing season, leading to larger harvests.
Benefits of Drip Irrigation for Indoor Use
Drip irrigation is a method of delivering water directly to the roots of plants through a network of tubes and emitters. It conserves water by minimizing evaporation and runoff, making it an efficient way to keep your plants hydrated.
Drip irrigation systems offer several benefits for indoor gardening:
- Water Conservation: Drip systems use less water compared to traditional watering methods.
- Consistent Moisture Delivery: They provide a steady and controlled water supply directly to the plant roots.
- Ease of Use: Once set up, drip systems require minimal maintenance, freeing up your time for other gardening tasks.
Setting Up an Indoor Drip Irrigation System
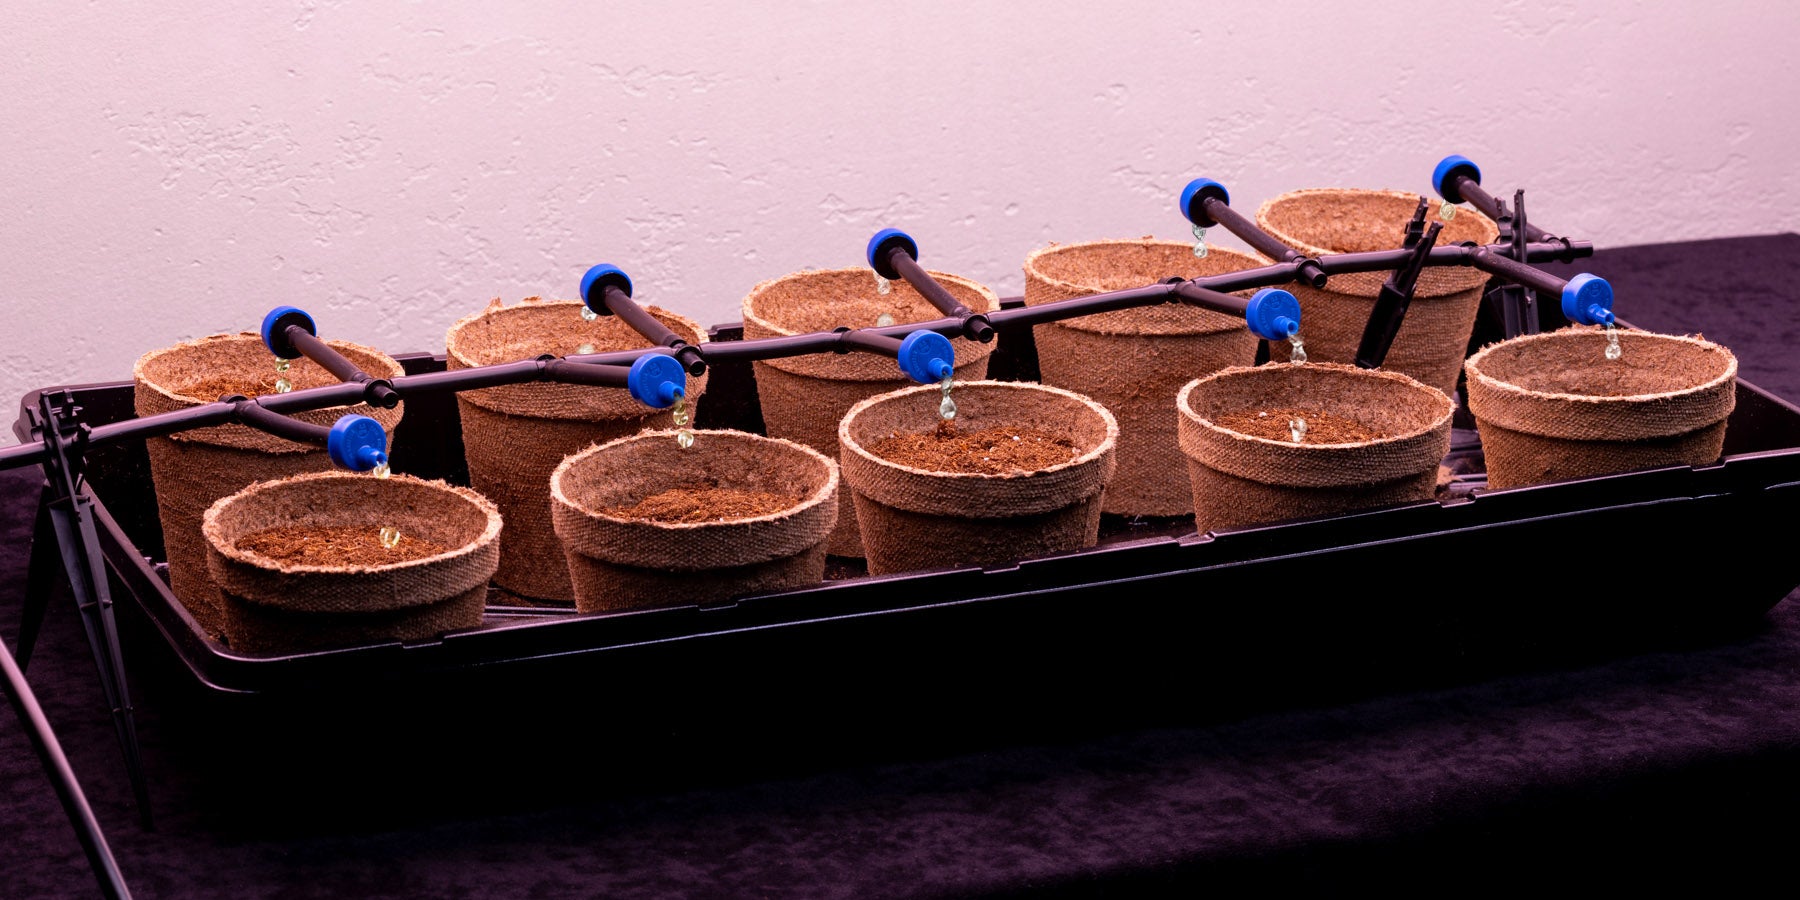
If you love starting your garden from seeds, a drip irrigation system can be an ideal way to conveniently water your seedlings. Building a matrix of irrigation tubing can be a fun winter gardening project, but the best part is using the variety of tubing, connectors, emitters, and other accessories to customize your indoor drip system to your needs and number of plantings.
In the following examples, we describe two simple setups with 4 trays containing 6 to 10 small pots each. Use these plans as a starting point for your indoor drip irrigation system.
Step 1: Install a Hose End Timer (optional)
Automate your watering schedule by installing a timer. Rain Bird's easy to program Hose End Timer allows you to schedule your watering times to ensure your plants receive consistent moisture.
Step 2: Connect to a Water Source
Connect your drip irrigation system to a water source. A utility sink with a threaded faucet is ideal. If your sink does not have a threaded faucet, you can find a faucet-to-hose adapter at your local hardware store.
Depending on its location, a traditional outdoor faucet is an option. However, no one wants frozen pipe damage, so please do not use a faucet that is susceptible to freezing.
First, attach a pressure regulator to your threaded faucet.

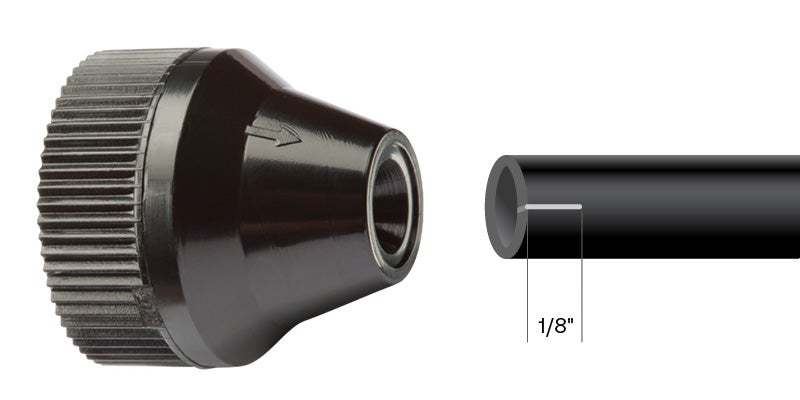
Next, attach 1/4" distribution tubing to a 1/4" tubing adapter. It helps to make a small 1/8" cut into the tubing (see fig. 1) to ease the tubing into the adapter. Then screw the adapter onto the pressure regulator.
Step 3: Run Tubing to Your Planting Area
Run 1/4” drip tubing from your water source to your plantings. This tubing will carry water to each plant, ensuring they receive adequate hydration. For larger planting areas or multiple trays, lay out the tubing to create a grid pattern.
Consider placing a tarp or plastic sheeting under your seedling trays to catch any drips.
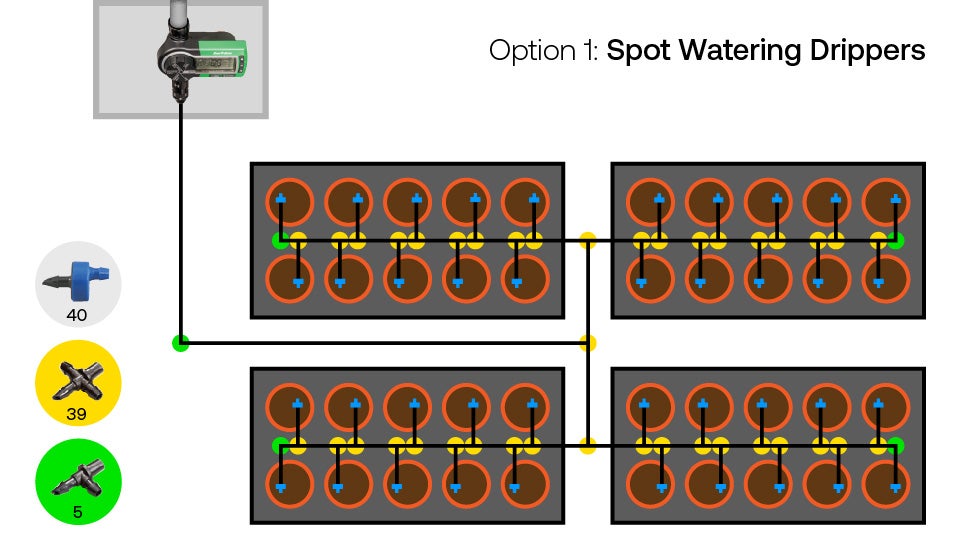
Option 1: Spot Watering Drippers
This option provides more control over watering and plant placement.

Materials needed:
- 100 ft. 1/4" tubing
- 40, 0.5gph emitters
- 39, 1/4" barbed Ts
- 5, 1/4" barbed Elbows
- 8, 1/4" tubing stakes
Instructions:
- Run tubing to the middle of the four trays. Cut the distribution tubing and add a 1/4" barbed T.
- Attach tubing to each end of the T. Cut tubing length to the middle of your tray and add another T on each end.
- Run tubing to the end of the 4 trays and cut.
- Start adding tubing runs to each individual pot by cutting the main line and adding a T.
- Cut tubing run and attach tubing to the T and run into the pot.
- Attach a spot watering dripper to the end. Spot watering drippers control the water flow.
- Repeat of each pot.
- Add an elbow to the end tubing run for the last potted plant. Repeat this process on the remaining trays and pots.
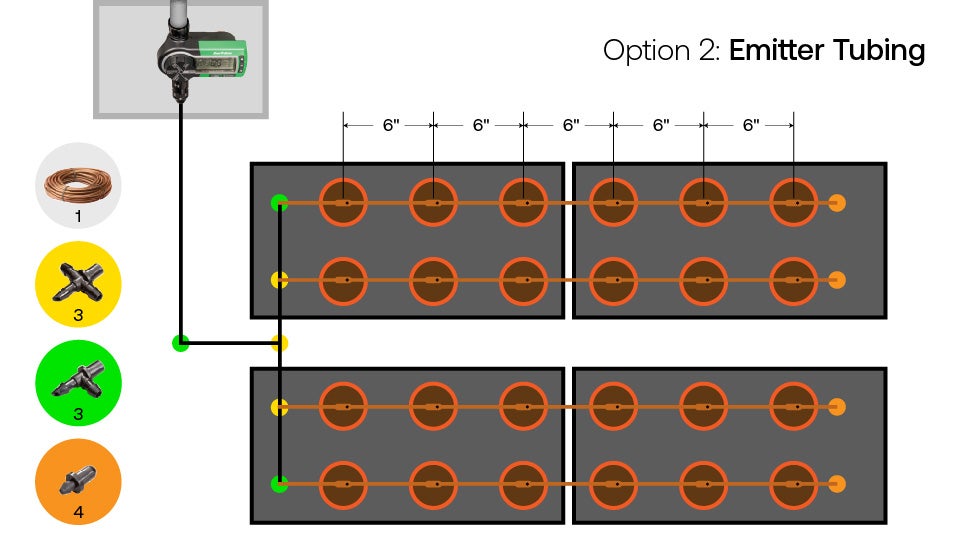
Option 2: Emitter Tubing
This option requires fewer parts but offers less control over watering and requires precise plant placement.

Materials needed:
- 50 ft 1/4" Emitter Tubing
- 3, 1/4" Ts
- 3, 1/4" Elbows
- 4, 1/4" tubing plugs
- 16, 1/4" tubing stakes
Instructions:
- Run tubing to the beginning of the trays. Ensure your pots are 6" apart based on the center of each pot. This includes across trays.
- Cut tubing and add a 1/4" barbed T.
- Cut a small section of tubing that reaches the middle of the first row of pots and insert another T.
- Cut another small length of tubing that reaches the center of the next row of pots and insert a 1/4" barbed elbow.
- Repeat on the other side.
- Extend 1/4" emitter tubing over the first row of pots. Ensure the emitter is over each pot.
- Trim 4 lengths of emitter tubing from elbow or T to 3" past the last pot.
- Attach 4 tubing runs to elbows and Ts.
- Cap each end with 1/4" tubing plugs.
- Use 1/4" tubing stakes to secure the tubing.
Starting your vegetable garden from seeds indoors can be a rewarding experience. By incorporating a drip irrigation system, you can simplify the watering process, conserve water, and ensure your plants thrive. Rain Bird offers a range of drip irrigation products that make setting up and maintaining an indoor watering system easy and efficient.
Remember, the key to a successful indoor garden is consistency. With the right tools and techniques, you can create a lush, thriving garden that provides fresh vegetables year-round. Explore Rain Bird’s full range of drip irrigation products and start your indoor garden.
