Is Your Sprinkler System Ready for Spring? Here’s How to Get Started
Winter’s over. Your landscape is waking up, and so should your automatic sprinkler system. A properly prepped system not only keeps your lawn lush and healthy but also saves water (and money) while preventing costly damage. But getting it ready for spring involves more than just turning the controller back on. If you skip a step, you could be looking at leaks, inefficiency, or even a complete system failure.
A dormant sprinkler system that hasn’t been checked can cause your wallet, your lawn, and local water resources to take a hit. The good news? With this bit of savvy prep, you can avoid these pitfalls and ensure your system is operating at peak performance as the growing season starts.
Why Spring Start-Up Matters
The transition from winter to spring is the most critical time of year for your irrigation system. Why? Because it’s been subjected to harsh winter conditions, even if you performed a fall blowout. Pipes may have frozen, seals may have cracked, and your backflow preventer may need close inspection. Ignoring these issues risks wasting water, harming your landscape, and violating local regulations if your backflow device isn’t up to code.
A smooth spring start-up ensures more than just watering efficiency—it means healthier plants, lower utility bills, and responsible water usage year-round.
Now, let’s get into the practical steps to prepare your automatic sprinkler system for spring.
Step 1: Check the Soil Before You Begin
Before you do anything, grab a shovel and check if the soil around your lawn is completely frost-free at least 12 inches deep. Starting your system when the ground is still frozen can cause pipes to burst, leading to serious damage—and expensive repairs. A quick soil check can save you major headaches.
Step 2: Inspect the Backflow Preventer and Valves
If self-installed or required by code, your backflow preventer is a crucial part of your sprinkler system. It protects your household water supply from contamination. Check for visible cracks or damage from the winter freeze. Make sure the drain plug is tight and that all valves are closed. If you’re not comfortable testing this device yourself, consider calling in a professional. It’s a small step that guarantees safe and clean water.

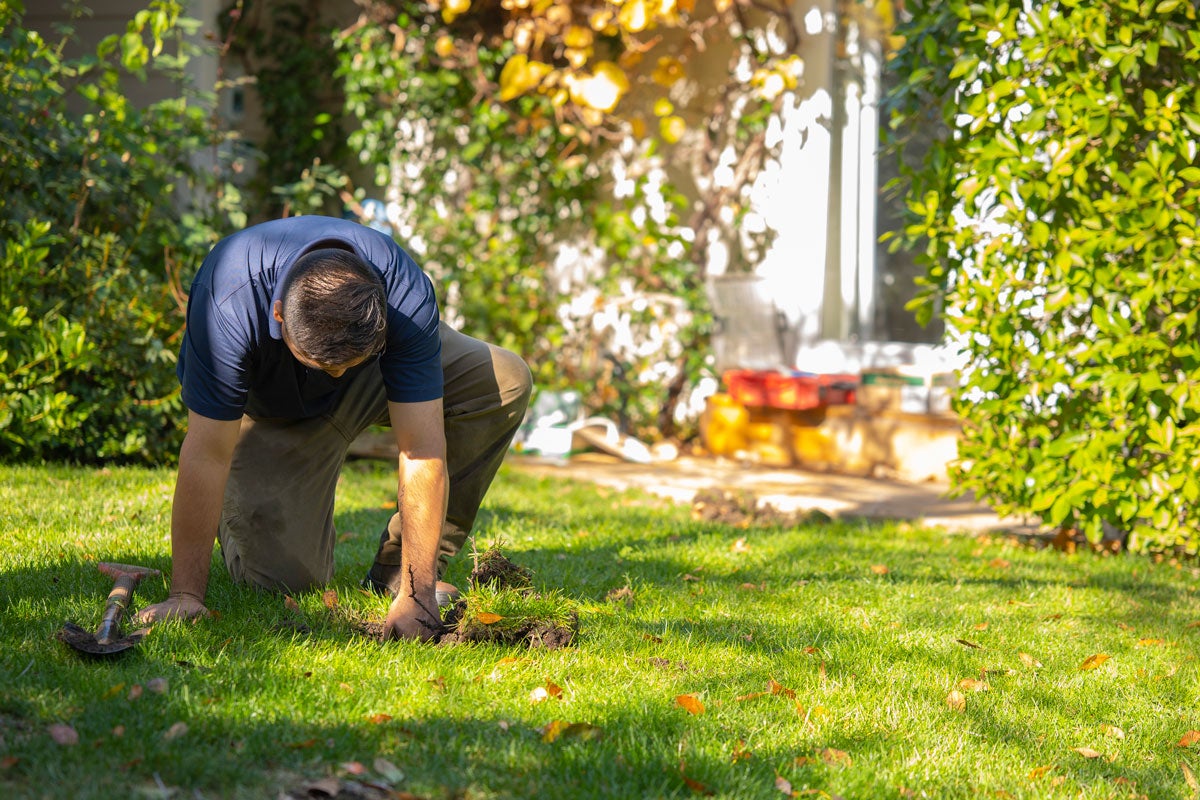
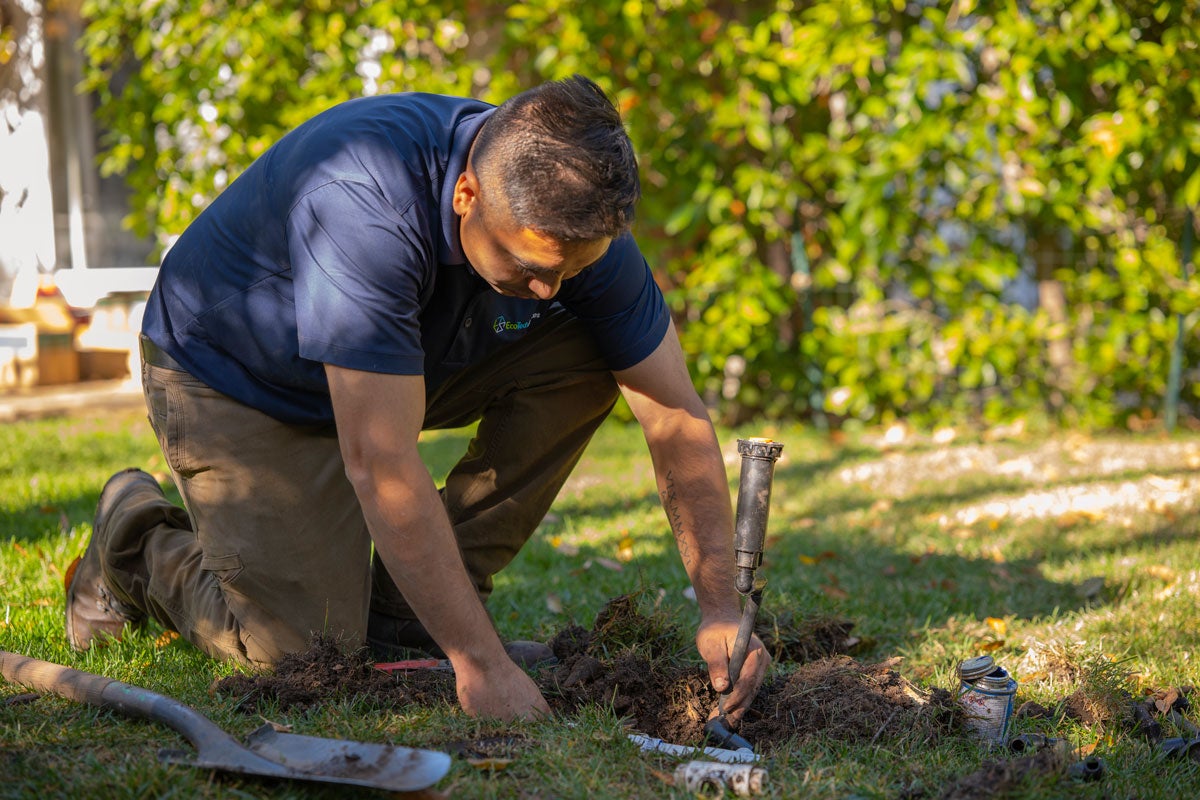
Step 3: Clear Debris from Sprays and Rotors
If you haven't used your sprinkler system all winter, the sprays and rotors can accumulate dirt and can be covered or hidden by grass, sand, and rocks. Ensure they are clear and not buried under debris. Use pruning shears to trim around the head, allowing the stem to pop up easily. Not doing so risks blockages and uneven watering. If you spot cracked or chipped components, swap them out. It’s better to address minor fixes now than deal with a bigger breakdown later.
Step 4: Dust Off the Controller
Your sprinkler system’s controller is the brain behind the operation. Take a moment to:
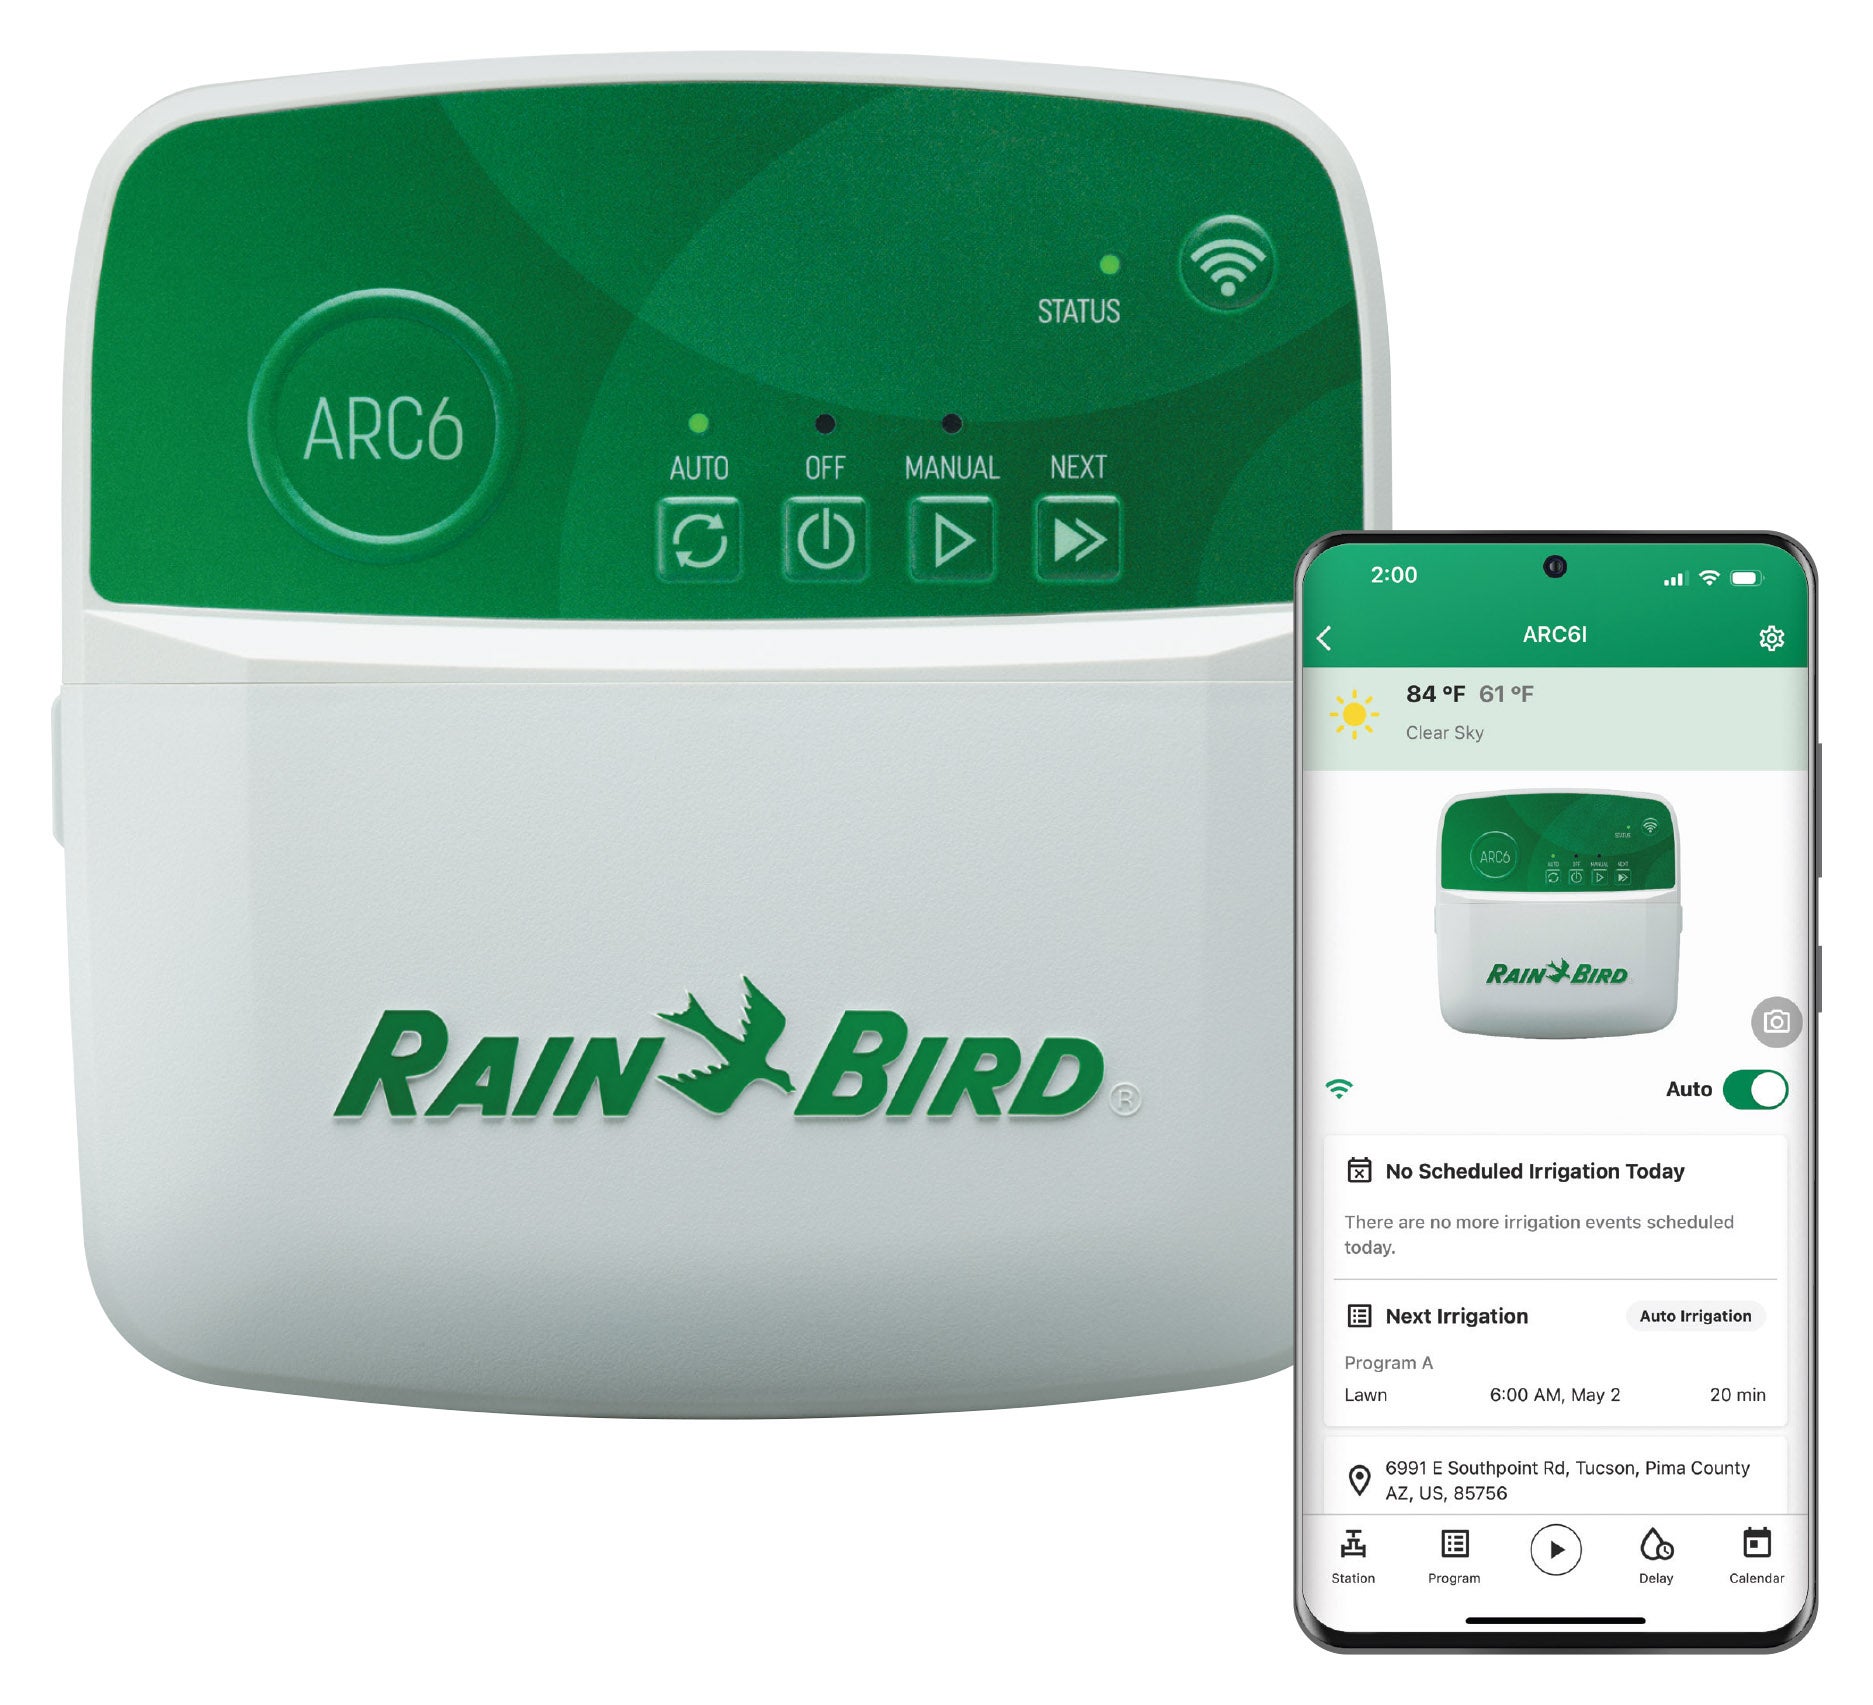
- Check that the date and time are correct. Rain Bird’s ARC Series controllers connect to your home’s Wi-Fi and automatically set the correct time and date. You can view the date and time in the Rain Bird 2.0 app in the controller settings.
- Set your controller to manual watering mode to test each station individually.
Pro tip: Keep a hard copy of your watering schedule nearby for easy adjustments.
Step 5: Open the Main Water Valve—Slowly
Turning the main valve on too quickly can create “water hammer,” or a surge of high-water pressure that can damage pipes and valves. Open the valve slowly and gradually to pressurize the system to avoid unnecessary wear and tear.
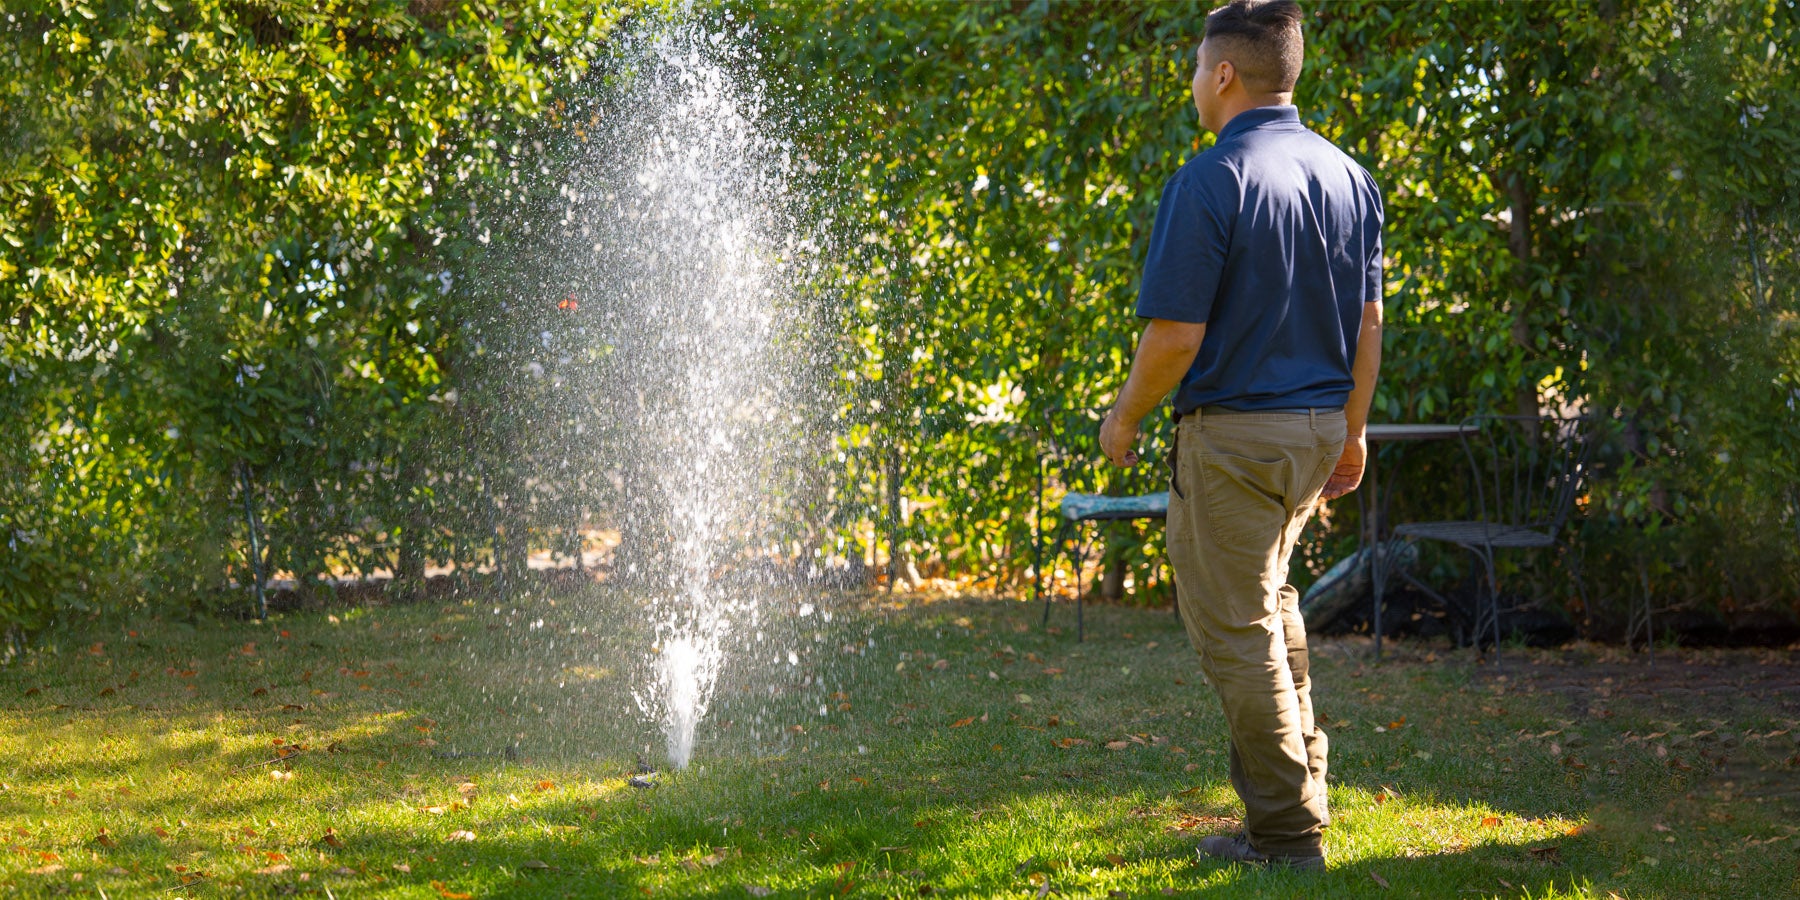
Step 6: Test and Fine-Tune Each Station
Activate each station manually from your controller to check for:
- Non-functioning rotors or sprays
- Proper Spray Patterns – Is every area of your lawn getting coverage?
- Leaks – Look for water pooling, particularly around sprinkler heads or pipes.
- Misting – This could indicate water pressure that’s too high or low, blocked nozzles, or bigger issues within the system.
Adjust the sprinkler heads for optimal coverage, clear out debris, and replace damaged components like nozzles or rotors before progressing.
Step 7: Check Water Pressure
Too much or too little water pressure can harm your system. Most automatic sprinkler systems operate best between 45-75 PSI. Use a water pressure gauge to make sure you’re hitting the sweet spot. If the pressure is off, adjust accordingly or consult a professional for high-water-pressure regulators.
Step 8: Reprogram the Controller for Spring
Now that your system is operational, check your watering programs to ensure they meet seasonal watering requirements. Watering times may depend on your local regulations, soil type, and early spring temps. Remember to adjust the schedule as the weather changes to avoid wastage or overwatering. With smart Wi-Fi controllers like the Rain Bird ARC Series, the seasonal adjustment feature automatically fine-tunes base run times daily using internet-connected weather data saving you time and money.
Rain Bird’s ARC Series controllers offer flexible scheduling via the Rain Bird app, so you can make adjustments easily on your smart phone to ensure a healthy, beautiful landscape, saving you time and money.
Go the Extra Mile with Professional Support
While these steps can be executed DIY, the truth is that a professional irrigation contractor can inspect your system with a trained eye. They’ll:
- Accurately test your automatic irrigation system.
- Diagnose hard-to-spot leaks or inefficiencies.
- Add or remove heads if necessary, to improve irrigation coverage.
Not only will this give you peace of mind, but it can also prevent small issues from becoming costly future repairs. Plus, professionals can introduce you to water-saving technologies like Rain Bird’s ARC Series smart controllers or drip irrigation solutions that improve efficiency and align with our guiding principal – The Intelligent Use of Water™.
What’s at Stake? Water Conservation
Conserving water isn’t just good for the planet—it reflects your commitment to smarter consumption and being a responsible homeowner. Regular system inspections and a well-thought-out spring startup process can save thousands of gallons of water each year. That translates to healthier lawns, lower bills, and a more sustainable future.