New Features
Version: 4.2.22.X
December 8, 2022
Multi-Select Tool for Map Operations
This feature enables the user to select multiple stations from the map to perform various operations, such as start, stop, pause, and resume.
To select multiple stations from the map, simply click on the “Multiselect” button and then select the stations you would like to control.
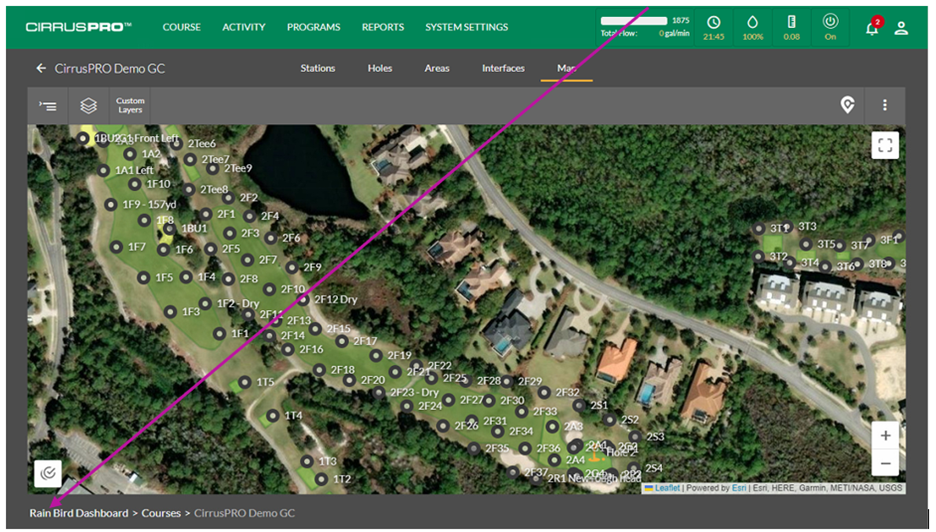
The selected stations will display a white circle around them. You can select as many stations as wanted, and this from wherever on the map.

Upon selecting stations, a small badge next to the tool will display the number of selected stations.
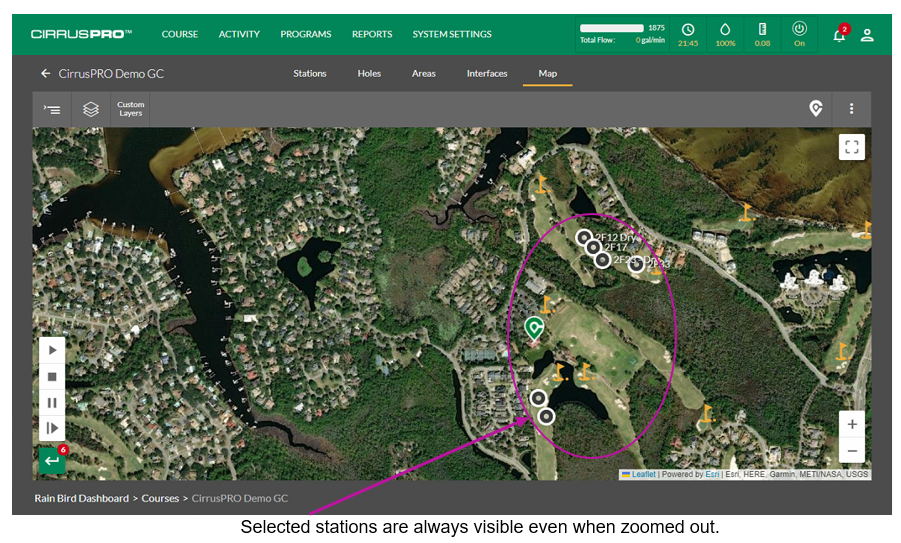
Please note that even if you zoom out beyond the level where stations are normally displayed, selected stations using the Multiselect tool will always be visible until the desired action is performed.
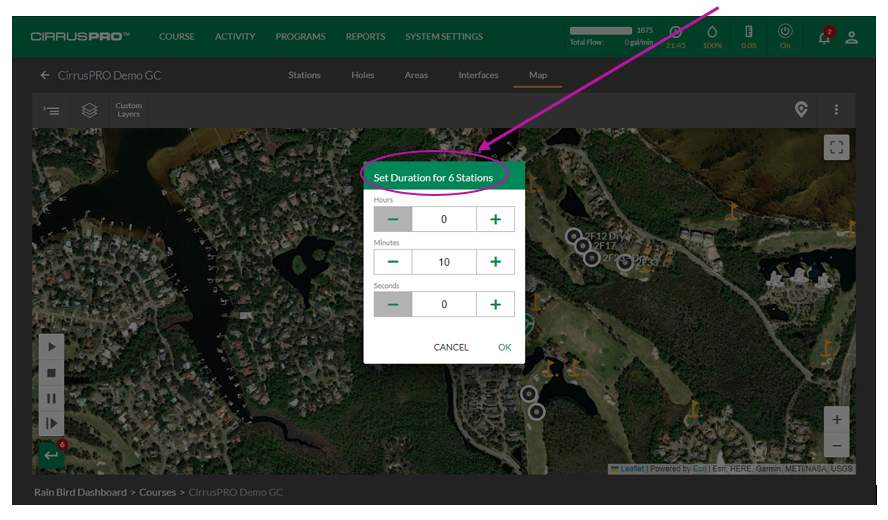
When you have finished selected the stations you want to control, select the desired function, such as Start. This will open the runtime selection box and also display the amount of stations selected.
Custom Map Layers:
CirrusPRO now allows the importation of custom layers to your map. The compatible formats for these layers include the following file types: png, jfif, pjpeg, jpeg, pjp, jpg, kml & kmz
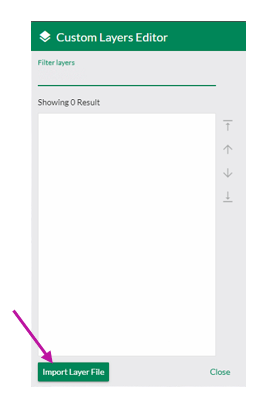
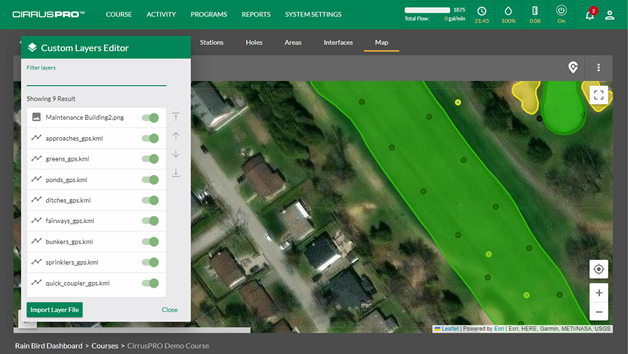
To import layers, simply click on the “Custom Layers” button on the top left of your map.
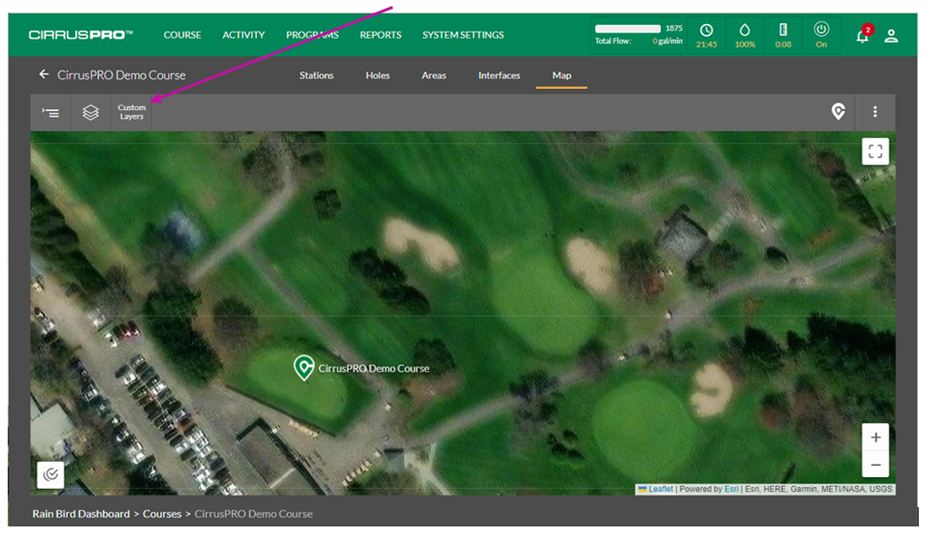
This will open a dialog box that allows you to manage your Custom Layers. To import a layer, simply click on the “Import Layer File” button.
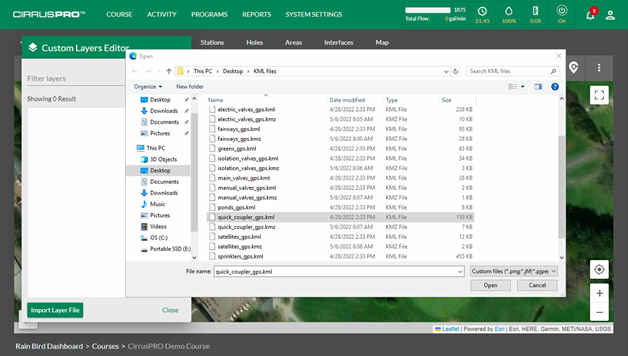
Then, navigate to where the file you want to import is located and select it.
In this example, we will import the location of quick coupling valves that were located via a GPS.
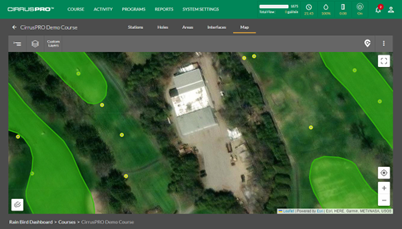
Once the layer file is imported, it should display on the map. It may be required to “refresh” the browser page in order to see the new layer.
Within the “Custom Layer” menu, if you select a layer, a side menu will appear, allowing you to modify the characteristics of that layer.
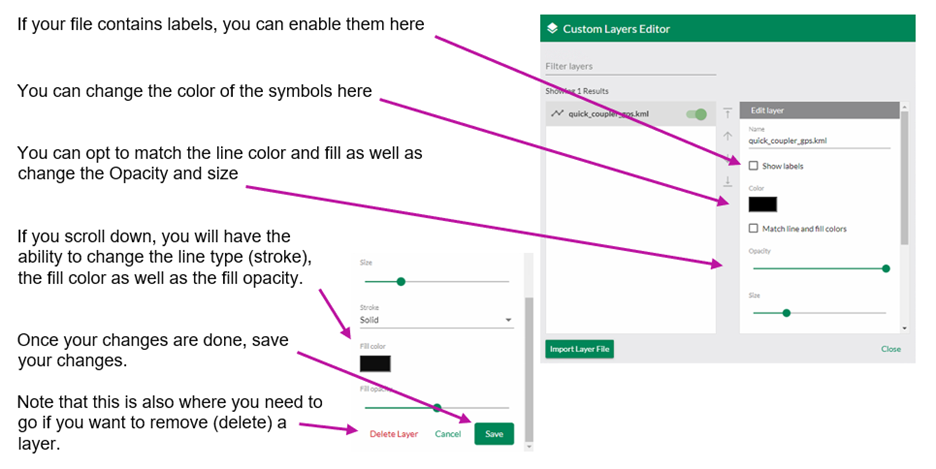
Below is our example after selecting yellow for the line and white for the fill for our quick coupling valves on this course:

Vector files that are properly georeferenced will automatically align items in your current map.
CirrusPRO includes tools to geo-reference Raster (e.g. bmp, png) image files. These tools allow you to align, rotate and stretch your images to a precise location on your map. As an example, let’s add an updated arial view of the maintenance building on top of our current map. Below is a view of the current map with the outdated maintenance building:
To insert an image, select “Import Layer File” from the Custom Layer menu (same as before), locate and select the image you would like to import.
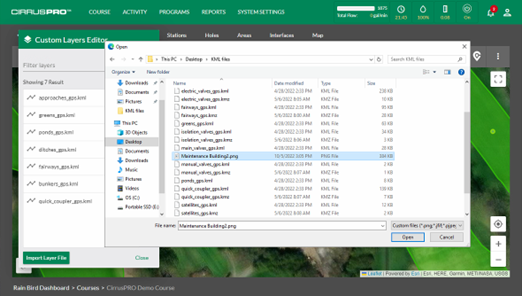
This will open the image and place it on the map. You will notice multiple icons on top of the image as well as “handles” at each corner.
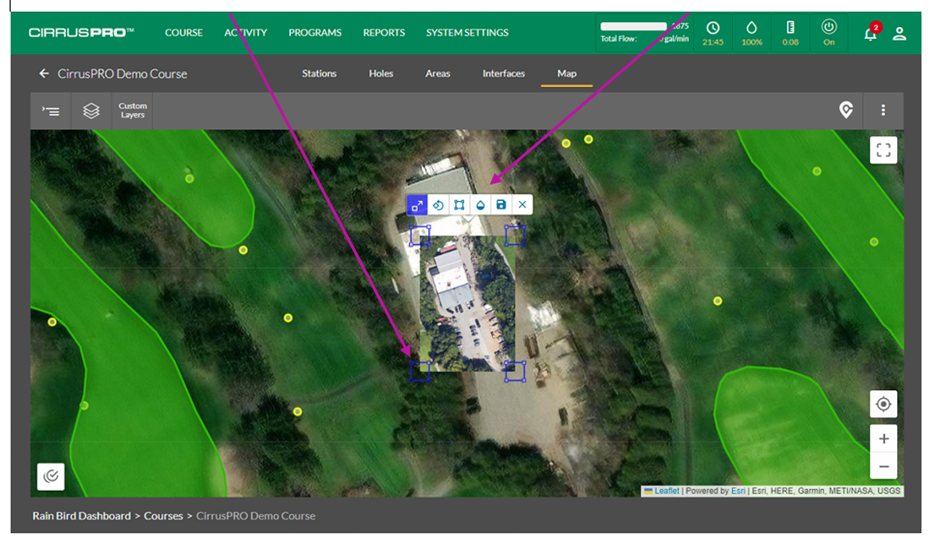
The icons offer you the following tools to geo-reference your image:
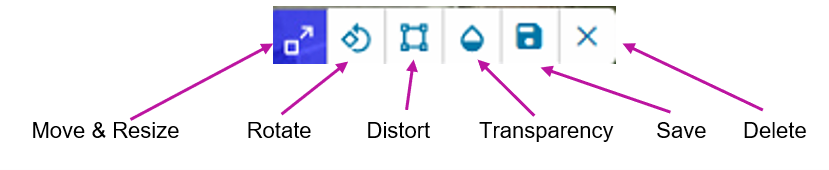
Follow these steps to geo-reference your image:
- Click on the “Transparency” button so you can see through your image in order to align it using visible landmark, such as corners of buildings, cart paths, grass features, etc.
- Click on the “Move & Resize” button and drag it into position while also changing the size using the corner handles until you can match underlying features with the features of your image
- If the image is fairly large (meaning covering a large area), it may be needed to stretch or “Distort” the image in order to properly align it.
- Clicking the “Transparency” on and off may help you validate your alignment.
- Once you are satisfied, “Save” your image/layer.
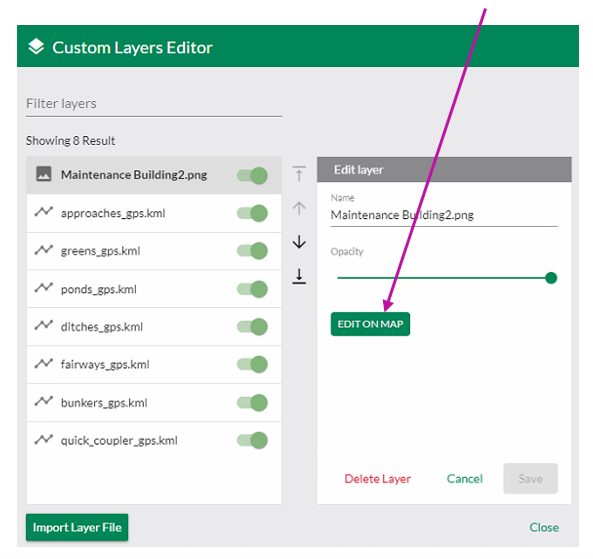
If you want to modify the characteristics of the image (such as the alignment) once saved, just select the layer in the “Custom Layer” menu and then hit the “Edit on Map” button.
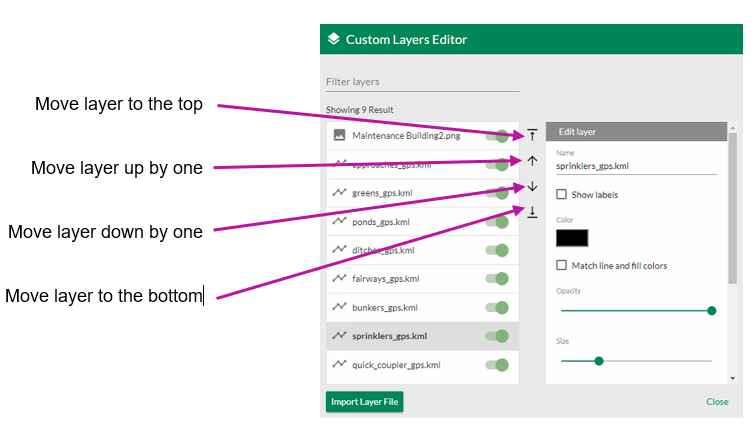
You can change the order of the layers to ensure that features are properly displayed on your map. As an example, in the image below, you can see that the “Fairways” layer is on top of the “Sprinklers” and “Quick Coupler” and the result is that the sprinkler and quick coupler symbols are only visible through the transparency setting of the Fairway layer.
To change the order of your layers, you can select a layer and then move it up or down the stack to reflect where it should be positioned.
Note that you can also click on a layer and drag it to the position you would like it to be. Below is the same image but with the Sprinklers and Quick Couplers layers placed above the Fairways layer.
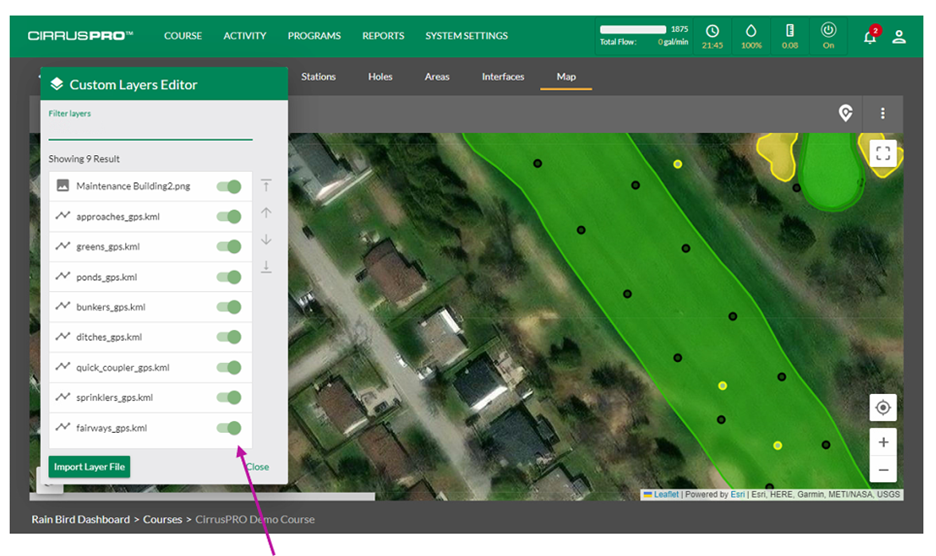
Lastly, you can easily show or hide any of your custom layers by toggling the layer on or off using these switches.